Solving Magento

Solutions for Magento E-Commerce Platform

by Oleg Ishenko

PDF and EPUB Versions of Magento Product Types: Developer’s Guide

I am happy to announce that my book Magento Product Types: Developer’s Guide is now available as PDF and EPUB on Leanpub! I have long been promising a version other than Kindle, and now there it is:

magento-product-types-devel

Leanpub offers a .mobi (Kindle) version as well. I still recommend getting the Kindle-formatted book from Amazon, which I have carefully tested. The Amazon links are in this post: Magento Product Types: Developer’s Guide

Your comments and Magento Questions

One of the most rewarding parts of blogging is getting comments and being asked questions on my work. Unfortunately recently I’ve been unable to quickly respond to your comments and give advice on your Magento problems. Currently I am deeply engaged in a startup and this takes all my time. For this reason I must recommend you to post questions on Magento StackExchange – the community there will help you faster and better than I ever could. I’m sorry, I’m not as available to my readers as I wished I would.

Magento Product Types: Developer’s Guide

Meet my new book:

magento-product-types-book
Magento Product Types: Developer’s Guide

What’s inside:

A detailed description of Magento product types that will help you understand the inner workings of products in Magento.

Each chapter is complemented by a step-by-step tutorial teaching you how to extend the standard product type functionality.

The last tutorial will explain you how to create a custom product type.

Continue reading

Magento OnePage Checkout Part 3: JavaScript

This is part 3 of the One Page checkout discussion. Previous parts are: Magento One Page Checkout Part 1 and OnePage Checkout Part 2: Model, Views, Controller.

One Page Checkout JavaScript Layer

The distinct feature of One Page checkout is that the checkout process can be completed without the browser having to request and load every step in a new page. Instead, One Page checkout uses JavaScript to control the navigation between steps, the steps visibility and availability. This JavaScript layer is also responsible for submitting step data to the checkout controller and interpreting controller responses to update the content of the checkout steps. You can find the JavaScript code used by One Page checkout in the following files:

  • /js/varien/accordion.js – contains a JavaScript class that combines checkout steps into an accordion-like object.
  • /skin/frontend/base/default/js/opcheckout.js – contains JavaScript classes representing individual checkout steps and the checkout as a whole. Note that this file is located in the skin folder – it is possible to have different One Page JavaScript for different skins.

Continue reading

Magento OnePage Checkout Part 2: Model, Views, Controller

This is part 2 of the One Page checkout discussion. You can find more about this checkout type in the Magento OnePage Checkout Part 1 and Magento OnePage Checkout Part 3: JavaScript.

Checkout Components

The checkout process described above requires a rather complex system to validate and save data, resolve step dependencies, render and update step forms. Magento implements it in an MVC pattern. First, there is a checkout model containing business logic to process steps (Mage_Checkout_Model_Type_Onepage). Then, there are views – blocks and templates to render steps. Finally, there is a controller (Mage_Checkout_OnepageController) to deal with requests posting and fetching step data. Keeping this design pattern in mind, I will describe the components of One Page checkout in the following sections:

  • Checkout session model
  • One Page checkout model and controller.
  • Checkout layout and templates
  • JavaScript layer

Continue reading

Magento OnePage Checkout Part 1

It is hard to overstate the importance of the checkout. You can’t have a web shop without a checkout – it is where customers exchange money for goods and services, which is, basically, the whole purpose of a shop. Checkout is the most sensitive stage of online shopping because there customers have to trust the merchant with their money and personal data. At the same time checkout is often a very frustrating experience: to submit an order customers must provide detailed address and payment information using long forms with many fields to fill out. Add to that dependencies between fields and validation rules, and there is no wonder that some people may become annoyed and quit in the process.

The most common way to solve the problem with the checkout data collection is to break it into steps – in each step a customer provides only a portion of the required data. Dealing with one part of data at a time is also beneficial for the checkout software – validation rules and dependencies between data (e.g. some shipping carriers are available only for certain destinations) can be better defined and made transparent to customers. Customers progressing through the checkout step by step get a feeing of being in control which results in a better shopping experience.

Online retailers strive to make the checkout as unobtrusive and intuitive to customers as possible. This quest for the perfect checkout had produced the following approaches:

  • Step-by-Step Checkout – the checkout stages (addresses, shipping methods, payment information, order review) are separated. Each step has its own form that the customer must fill out and submit before moving to the next stage. The advantage of this method is that it can be implemented without JavaScript and can be used in cases where JavaScript is not available.
  • One Page Checkout – steps are accommodated in a single page under one URL where they are put into individual tabs. The navigation between tabs and the updating of the tabs’ content happen without reloading the page – Ajax requests handle the data exchange in the background. The biggest advantage of this method is that customers get a feeling that all their data are there in one place, and in the same time there is no endless list of input fields – generally, only the active step is shown while others remain hidden in the closed tabs.
  • One Step Checkout – all steps are in one page, their input fields grouped in fieldsets but, unlike the one page checkout, all forms are visible. This approach is most advantageous when the number of fields to fill isn’t that great and breaking the process into steps makes little sense, for example, when your shop doesn’t need a shipping address and shipping method (selling downloads).
  • One Click Checkout – this approach made famous by Amazon enables customers to buy goods with a single click. This method is possible only for customers who have an account in the shop with valid address and payment information that they let the merchant use as the default checkout data. The variations of the One Click checkout may have different names (e.g., “Express Checkout” or “Express Lane”) but they have one thing in common – using existing customer account data and skipping one or more steps. This way they relieve customers from a burden of typing it all in and reduce chances of them jumping off in the process.

Core Magento implements two of these types: One Page and Step-by-Step. One Page checkout is enabled right after Magento is installed and can be used for any product type. I will describe the One Page checkout process and its components in details in this chapter.

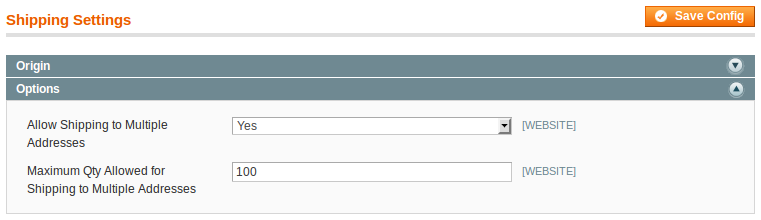
Multishipping checkout is a Step-by-Step type and allows customers to send orders to multiple addresses. The properties and limitations of this checkout are discussed in a separate chapter: Magento Multishipping Checkout.
Continue reading

Magento Multishipping Checkout

Multishipping checkout, as its name suggests, offers a possibility to order products to different shipping addresses. To use Multishipping checkout you must enable it in the back-end configuration at System > Configuration > Sales > Shipping Settings > Options > Allow Shipping to Multiple Addresses.

multishipping_enable

Figure 1. Enabling Multishipping checkout.

Multishipping checkout availability may also depend on some other factors:

  • Minimum order amount. You can control the minimum order amount using options found at System > Configuration > Sales > Minimum Order Amount. If you set Validate Each Address Separately in Multi-address Checkout to yes the system will check each address for minimum amount separately, which means that the total for each address must be greater than or equal to the pre-set minimum order amount.
  • Physical products. Multshipping checkout is about delivery to real addresses and requires at least one valid physical item. Downloadable or virtual products need no shipping addresses and are irrelevant for Multishipping. Note that if there is a composite product whose children can be shipped separately, they are counted separately as well.
  • No nominal items. Nominal items are related to recurring profiles and are irrelevant for Multishipping, therefore a multishipping quote must not contain non-virtual nominal items.

Multishipping checkout is not available to guests. Also, new customers must register (and provide an address) before using Multishipping, which is different from Onepage checkout where new customers can choose to create an account after going through the checkout and submitting an order.

Continue reading

Taxes in Magento: Module Mage_Tax

Albert Einstein once said: “The hardest thing in the world to understand is the income tax.” It is sales tax you have to deal with in Magento, but these words can be just as true. Magento implements sales tax (or value-added tax – VAT – in some countries) with a purpose to cover maximum possible cases in different countries and locations; and the result is as complex as one can expect. This complexity is encapsulated in one module Mage_Tax that provides helpers and tax calculator models to the rest of the system.

When setting up a shop, you typically have one or several tax rates that have to be applied to products. Depending on the tax code, some products may have different tax rates than others. Also, some customers can be eligible for different rates, such as reduced sales tax for non-profit organizations. Some tax codes may require you to apply taxes based not on the location of your store but on the customer’s address – and all those locations can have different tax rates! To tackle these problems Magento operates a system comprising customer and product tax classes, zones and rates, and tax rules that must be matched to each other to produce the right tax rate.

Continue reading

Magento Downloadable Product Type (Part 2)

In this post I will describe models and processes specific to Magento downloadable products. To find out about creating downloads and managing their front-end display see the first part of the Downloadable product type overview.

Downloadable product type configuration

Every product type must be configured in the Magento’s global configuration in node global/catalog/product/type. The Mage_Downloadable module’s config.xml extends this configuration with a downloadable node:

Continue reading

Magento Downloadable Product Type (Part 1)

Magento’s Downloadable product type is meant to sell files. Software, e-books, images, music or video – any type of content that can be packaged into files and downloaded can be sold using this product type. Since it is all about files, a large part of functionality implemented in module Mage_Downloadable is dedicated to deal with them: uploading and storing files, managing customer access and processing file downloads. Downloadable purchases need no physical shipping: once the order is cleared, its delivery is handled by links that the customer either gets by email or accesses by logging into his store account. In this post I will describe how to create and manage downloadable products, how are they displayed in the front-end, what specific procedures are necessary to process downloadable purchases, and how does delivery of downloads work. But before going there, let’s take a look at the configuration options of the Mage_Downloadable module.

Continue reading

Magento Bundle Product Type (Part 2)

This is the second part of our discussion on Magento Bundle product type. In the first part we concentrated on the back-end management of bundle products and on the front-end display specifics. In this post we will discuss the functionality implemented by the Bundle product type class; but first, let’s look at bundle options and selection classes.

Bundle Option and Selection Classes

Bundle options are represented by model class Mage_Bundle_Model_Option and a resource model Mage_Bundle_Model_Resource_Option. The option data is saved in two tables: catalog_product_bundle_option and catalog_product_bundle_option_value. The first table contains the general option data such as:

  • option_id – a unique option identifier;
  • parent_id – ID of the bundle product to which the option belongs to;
  • required – a flag indicating that a bundle can’t be added to cart without this option being configured;
  • position – parameter used to sort lists of bundle options in an ascending order;
  • type – one of four allowed option types: drop-down, radio buttons, multiselect, and checkbox. The string constants corresponding to each type are defined in the Mage_Catalog_Model_Product_Option class:
    class Mage_Catalog_Model_Product_Option extends Mage_Core_Model_Abstract
    {
            /**code omitted for brevity **/
            const OPTION_TYPE_DROP_DOWN = 'drop_down';
            const OPTION_TYPE_RADIO     = 'radio';
            const OPTION_TYPE_CHECKBOX  = 'checkbox';
            const OPTION_TYPE_MULTIPLE  = 'multiple';
            /**code omitted for brevity **/
    }
    

    Listing 5. Option type constants, /app/code/core/Mage/Catalog/Model/Product/Option.php, line 65

Continue reading

Theme: Esquire by Matthew Buchanan.